Crafted with Care: Elevating Your Greetings to Works of Art
In a world of instant messages and fleeting digital pings, there is something undeniably soul-stirring about holding a handmade card. It’s more than just paper; it’s a tactile “I love you” that can be tucked into a drawer and rediscovered for years to come.
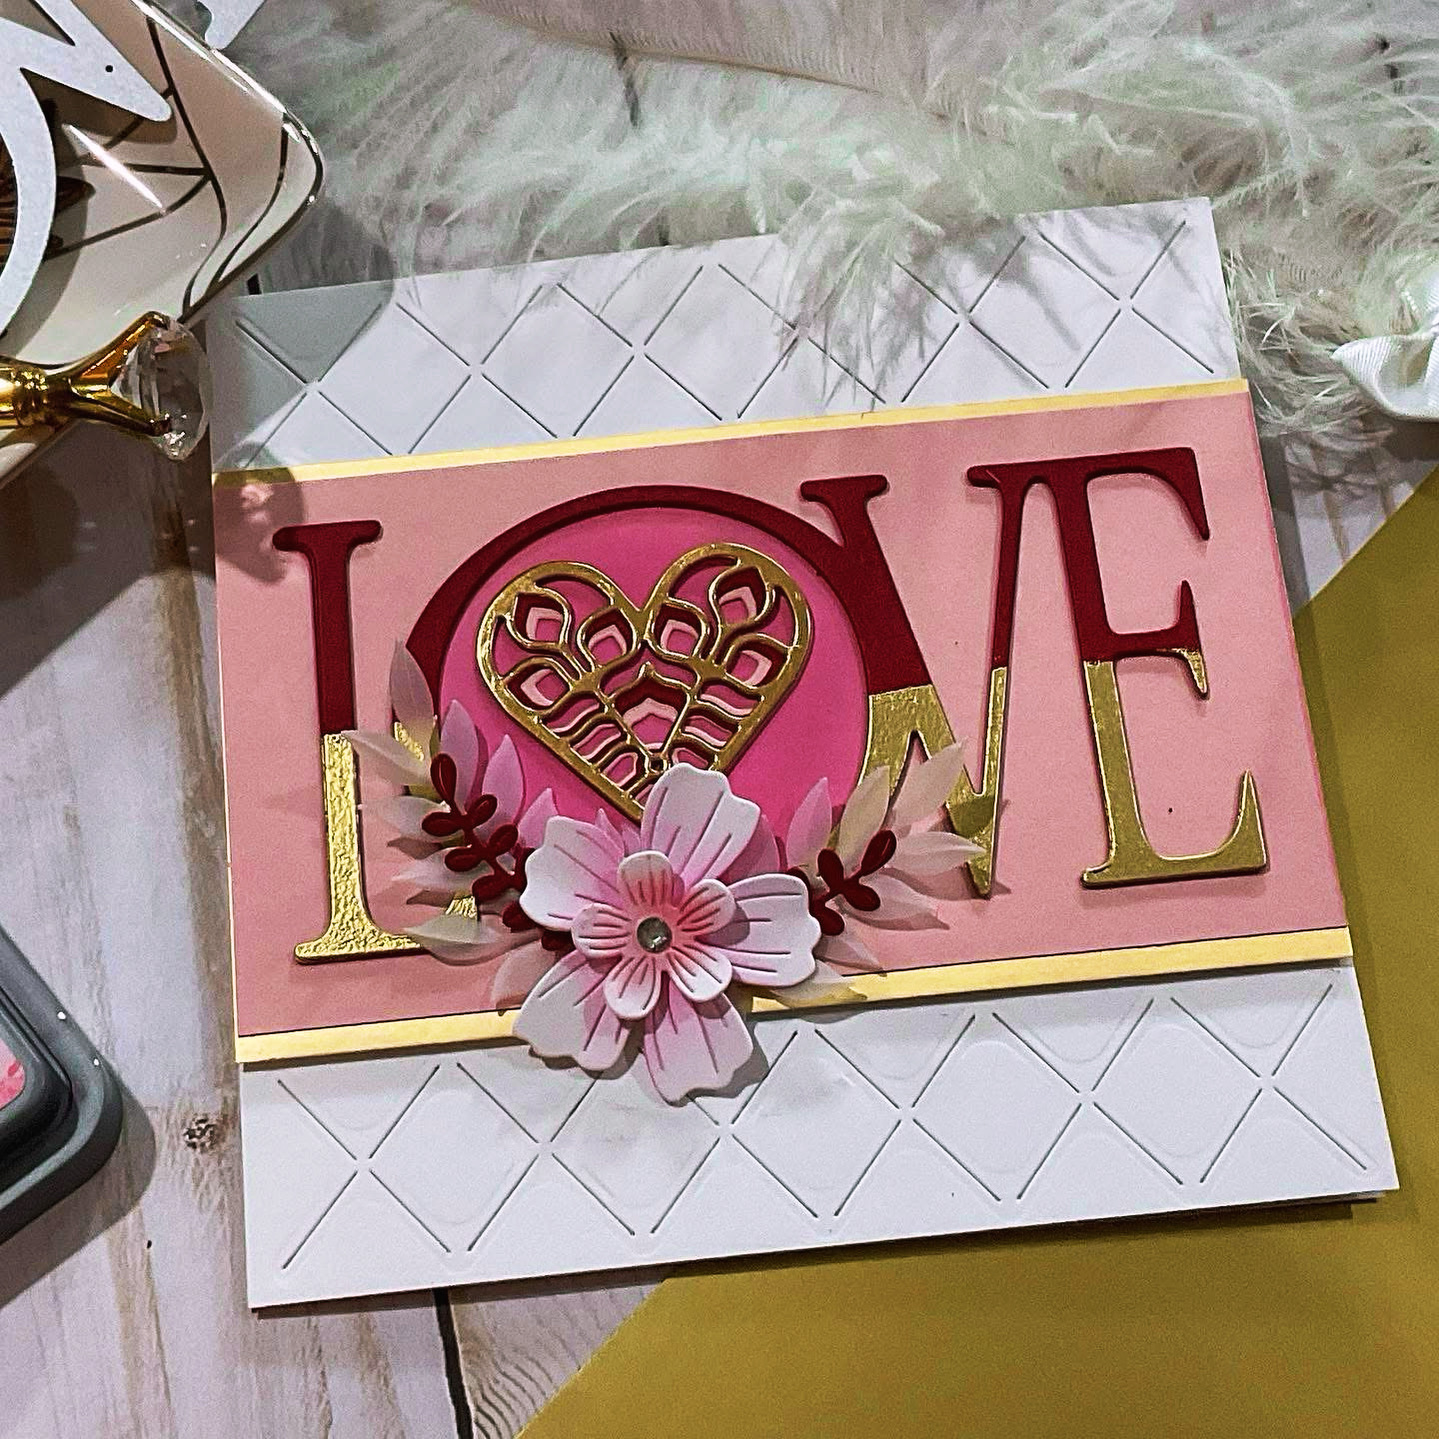
Today, we’re diving into a design that proves love is in the details. This isn’t just a card—it’s a masterclass in texture, dimension, and romantic flair.
Layering the Love
The secret to a card that “pops” isn’t just bright colors; it’s architectural depth. Notice how this piece utilizes a multi-layered approach to create a visual feast:
* The Foundation: A crisp, white base with a geometric debossed pattern. It adds a sophisticated “quilted” texture that feels premium to the touch.
* The Focal Point: A bold, die-cut “LOVE” sentiment where the “O” acts as a window into a golden, filigree heart.
* The Gradient Effect: Check out that stunning ombre transitions on the lettering, moving from a deep pomegranate red to a shimmering gold. It’s where “Creative” meets “Classy.”
“Handmade doesn’t mean ‘amateur.’ It means ‘intentional.'”
Blooms that Breathe
To soften the bold lines of the typography, a delicate floral arrangement sits front and center. By using vellum leaves and layered paper petals, the card gains a 3D effect that makes the flowers look like they’ve just landed on the page. A tiny rhinestone in the center provides that final “wink” of light that catches the eye.
Why This Works
This design strikes the perfect balance between maximalist detail and clean composition. By keeping the top and bottom of the card white and patterned, the central pink panel draws the eye directly to the message. It’s a sophisticated palette of blush, gold, and burgundy that feels timeless.
Tips for Your Next Masterpiece:
* Don’t be afraid of height: Use foam adhesive squares to lift your focal points off the page.
* Mix your metals: Gold accents paired with soft pinks create an instant “luxury” vibe.
* Texture is king: If you don’t have a die-cut machine, try using textured cardstock or even fabric scraps to add sensory interest.
The verdict? Papercrafting is the ultimate way to turn a moment into a memento. Whether it’s for an anniversary, a wedding, or “just because,” a card this beautiful ensures your message is never forgotten.
I’ve created a list of the essential tools and supplies you’ll need to recreate that stunning card. Good luck with your crafting!
Handmade Card Essential Tools and Supplies
❤️Embossing folder with geometric/diamond pattern
❤️Die-cut machine and ‘LOVE’ sentiment dies
❤️Heart filigree die
❤️White heavy cardstock for the base
❤️Blush pink cardstock
❤️Versamark ink with gold embossing powder
❤️Deep burgundy or pomegranate cardstock
❤️Vellum for translucent leaf accents
❤️3D foam adhesive squares for dimension
❤️Small rhinestones or gems for flower centers
❤️Precision paper glue
❤️Double sided adhesive